






































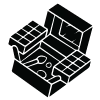






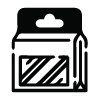

















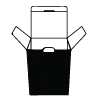

A dieline is the flat cutting and folding template used to turn a printed sheet into a package. It maps the cut lines, scores, glue tabs, tray base, walls, lid, sleeve, and printable panels. Bleed is artwork that continues past the cut line so a small cutting shift does not leave an unprinted edge.
A tray box template has meaning only when it matches the product cavity, board, opening direction, and package structure. CPL can start with its tray box production files and adapt the current template with free design support. The working file should describe the physical package, not a generic tray shape downloaded without checking the build.
What does a tray box dieline template show?
A tray box dieline shows how the flat sheet becomes the assembled tray and how the outer lid or sleeve meets it.
| Dieline mark | What it means | What to check |
|---|---|---|
| Cut line | The boundary where the sheet is separated | Keep important type and logos clear unless the cut is intentional |
| Score line | The crease where a panel changes direction | Check which face becomes the outside after folding |
| Glue tab | The flap used to join two panels | Keep barcodes and supplied copy out of the joining area |
| Tray base | The flat panel that supports the product | Check the cavity, clearance, and removal direction |
| Tray wall | The raised panel around the product | Check wall direction and how the sleeve or lid meets it |
| Artwork safe area | The practical zone for important printed information | Keep copy clear of cuts, scores, edges, and glue |
How do you read a dieline for a tray box?
Read a tray box dieline as an assembly map. Start at the tray base, trace the walls, locate every joining flap, then follow the lid or sleeve around the finished tray.
- Mark the product cavity and the direction the product enters the tray.
- Separate cut lines, scores, glue areas, windows, and closure features from artwork.
- Label the front, back, side, top, and interior panels before placing copy.
- Check whether a panel faces outward, inward, or disappears under a sleeve.
- Inspect the assembled orientation before approving the flat layout.
A flat file can look balanced while turning a logo inward or placing copy under the sleeve. Trace the fold direction, then compare the result with the assembled proof.
Why does a tray template change by product?
The product changes the tray cavity, wall height, removal clearance, and opening movement, so two tray boxes rarely share the same working template.
For a separate lid and tray, compare custom cardboard boxes with lid and tray and custom lid and tray boxes. A sliding structure uses custom sleeve and tray boxes. For presentation-led formats, review jewelry boxes with lid and tray or rigid boxes with sleeve and tray. These catalog pages give the quote a real structure to discuss while the final cavity still comes from the product.
How should artwork sit on a tray dieline?
Artwork should follow the assembled faces, not the empty shape of the flat file.
Keep type, logos, and barcodes away from scores, cuts, glue tabs, and tray edges. RGB artwork can shift when it is converted for press, so check color and small text on the digital proof. Low-resolution images stay soft after printing. A bleed belongs outside the cut line, and a background that stops at the cut can leave a paper edge.
The quote should identify the print method, such as digital or offset, when that choice affects the file review. Free design support can place the supplied artwork on the selected production file. CPL sends a digital proof before anything prints.
What should you send to use a custom tray template?
Send the product dimensions, packed orientation, opening preference, tray or insert needs, quantity, artwork status, and delivery destination.
- Measure the product in the position it will occupy inside the tray.
- State whether the package needs a lid, sleeve, insert, or visible tray wall.
- Include a product photo or sketch when the opening direction is hard to describe.
- List the printed panels and any finish direction for the quote.
If you need a dieline template tray box file, request the current file for the selected structure. The custom packaging design page gives the design request a clear starting point.
What should you check before proof approval?
Check the assembled orientation, product fit, sleeve or lid movement, closure, artwork position, supplied copy, finish notes, and the way the product comes out.
Consolidate structural and artwork revisions before approval. Projects use a 100-unit MOQ. Pricing is from $0.49 per unit at volume, quoted to spec. Production is typically 8 to 10 business days after proof approval, plus delivery. Free US shipping and free design support are available. The $19.99 sample kit is credited toward the first order. Send the product dimensions when you are ready for the current tray file.
Frequently Asked Questions
Can I use one tray dieline for different products?
A tray dieline usually needs a product-specific check because the product changes the cavity, wall height, removal clearance, and opening direction. CPL can start from its tray box production files and adapt the selected structure with free design support. Send the product dimensions and packed orientation before approving the template.
What do cut and score lines mean on packaging artwork?
A cut line marks where the sheet separates, while a score line marks the crease where a panel folds. On a tray box dieline, check both against the assembled package. Keep important copy, logos, and barcodes clear of those lines unless the proof intentionally places artwork across a fold or cut.
Does CPL draw the tray dieline?
CPL provides free design support and can draw the dieline around the selected tray structure, product dimensions, opening direction, and artwork plan. The process includes a digital proof before anything prints. Send the product measurements and any tray, lid, sleeve, or insert requirements so the working file matches the package.
Should I approve a flat tray file without an assembled check?
Approve a tray dieline only after checking the assembled orientation, product fit, closure movement, artwork position, copy, and finish notes together. A flat layout can place artwork on the wrong face or under a sleeve. Production is typically 8 to 10 business days after proof approval, plus delivery.
What does a tray packaging order cost and how long does it take?
Tray packaging projects use a 100-unit MOQ, and pricing is from $0.49 per unit at volume, quoted to spec. Production is typically 8 to 10 business days after proof approval, plus delivery. Free US shipping and free design support are available, and the $19.99 sample kit is credited toward the first order.